Thursday, September 29, 2011

SAP IDoc Data With Japanese Kanji or Chinese Characters Overflows

Recently came across an issue while integrating SAP R3 (4.2) version with SOA 11g (11.1.1.4). When idocs are received by SAP Adapter from the SAP system containing Japanese Kanji/Chinese special characters, it was found that the data overflows on to next segments/xml tags and is distorted. This causes mapping issues as incorrect data is being mapped to. The root cause behind this behaviour is that SAP R/3(4.2) is a non-unicode system while SOA 11.1.1.4 is Unicode.

The issue is covered in below Oracle documentation as well
http://download.oracle.com/docs/cd/E14571_01/relnotes.1111/e10132/adapters_iway.htm#CIHBCICF

Here is the explanations provided by Oracle

"This issue only occurs on non-Unicode SAP MDMP environments, where one character can be two or more bytes. As an example of this issue, when using Japanese, the SAP field length is four characters. The English word "ball" fits correctly into the field because one character equals one byte. The Japanese word for ball in Shift-Jis encoding is three characters, but two bytes per character, so the last character is truncated and the last character appears in the next field. Since IDocs are positional delimited, this can cause errors in processing. This occurs because SAP uses character length, not byte length for all non-Unicode field lengths. There is no work around on this issue other than using Unicode or using shorter text in IDocs in DBCS."

None of the workaround suggested above were feasible options. So tried the below approach to fix this...

From SAP before sending the idoc, convert all Japanese strings to hexadecimal characters. Once SOA suite receives the idoc, the BPEL uses a java embed/custom XSLT function (java code) to convert the hexadecimal back to Japanese characters.There is lot of sample code available for doing these kind of hex to string conversion. Just make sure you are using the correct charset (like shift-jis for japanese kanji) while doing the conversion.
Now you should be able to see the idocs properly and use the converted japanese,chinese special characters correctly in your mappings.

Thursday, September 22, 2011

SSO (SAML 1.1) Setup In SOA 11g

This post covers the steps required to configure SSO (SAML 1.1) with SOA 11g. Having Single Sign On(SSO) enabled helps the end users as they don't have to remember different username/password combinations for different applications. When tied with a LDAP provider (Like Microsoft Active Directory or Oracle Internet Directory), SSO helps in providing a robust authentication mechanism along with a seamless user experience.

SOA 11g and weblogic have made the SSO configuration very easy for administrators. Its all done on the Weblogic Admin console and doesnt require running any backend scripts or changing files on windows/linux. So lets take a look at some screenshots which show this easy setup.

Create a new Authentication provider (SAMLIdentity Asserter) and reorder to make sure it looks as below.

 Create a new Asserting party and specify properties as shown below

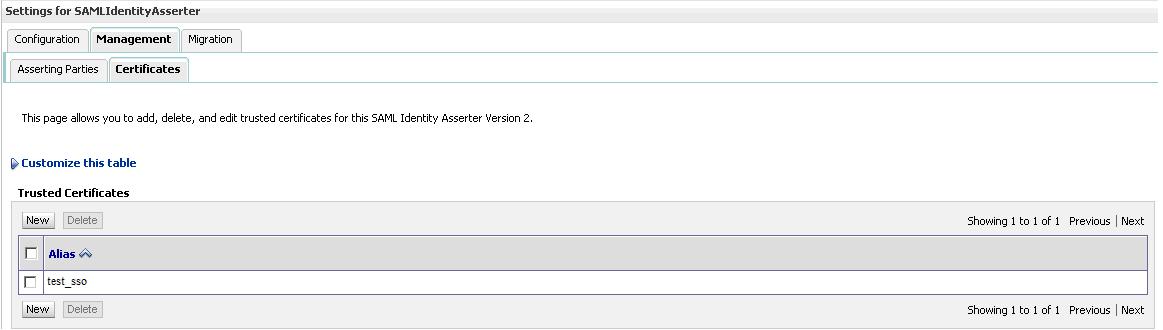
Create a new trusted certificate (same alias as above screenshot) and import the certifcate(.der) file.

      Finally under Managed Server -> Federation Services configure your SAML 1.1 Destination as shown
      below
That's it. Restart the Admin and Managed servers and you should be able to see the SSO redirection happening correctly. Basically whenever you hit your URL (bpm workspace in above screenshot) you should be redirected to your SSO site which should then pull up your user credentails from LDAP provider (lets says NT login) and authenticate you so that you dont have to login explicitly to your URL.

Incase you want to turn on Debug for SSO/SAML to troubleshoot issues with redirection or other errors, follow the below steps in your Weblogic Admin Console. Select Lock & Edit and click on your managed server and under the Debug tab, expand Weblogic->Security and select SAML and click on Enable and save. That's it. You should be able to see the Debug messages related to SSO/SAML in your Managed Server log file now.


Thursday, September 1, 2011

Oracle WebTier (11g) Installation hangs

Oracle WebTier provides components like HTTP Server and WebCache which help in routing http requests from external users to the application server. It provides lot of flexibility to Oracle SOA Suite installations by having security, clustering, load balancing features built into it.

I have been using Oracle Webtier for most of my SOA 11g Cluster installations and the installation/configuration has been pretty straight forward. For a WebTier 11.1.1.4 installation basically install the 11.1.1.2 via Installer and apply the 11.1.1.4 patchset on top of it. This is followed by some post install configurations incase you want to setup cluster i.e adding load balancer (VIP) url in httpd.conf and mod_wls_ohs.conf files.

Tried to capture a few installation screenshots below:

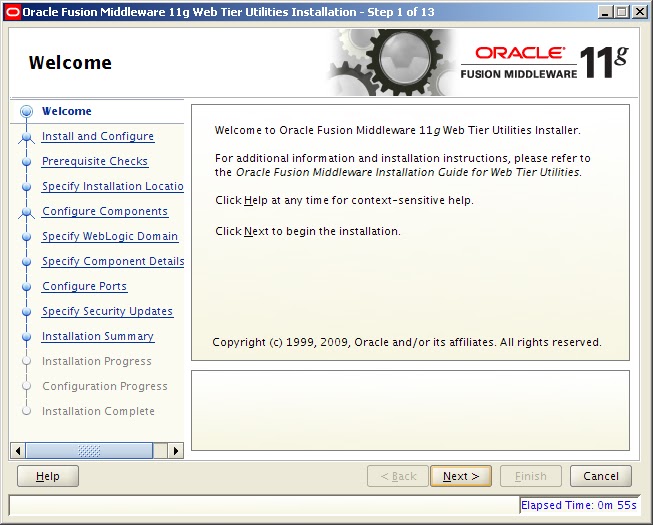
Choose the installation type. Default is to Install and Configure in one shot.


Specify the admin server fully qualified domain host name. Eg. abc.mycompany.com


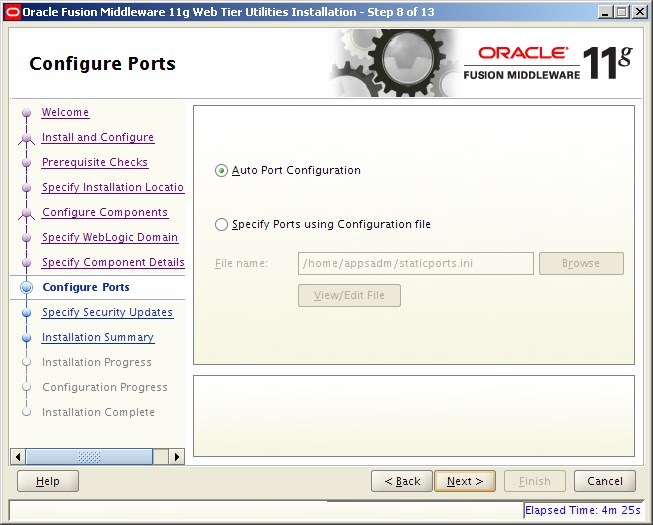
This is where the issue happened. Usually in all my previous installations the post install config step below was successful. But somehow on this specific server it was always getting stuck at 0% and I couldn't find any errors in the install log files for this weird behaviour.
After couple of attempts I decided to take an alternate route of Installing Webtier only (Choose the option Install Software- Do Not Configure) and configuring it in a later step by running (WT_HOME/bin/config.sh). This approach worked and I was able to continue with my installation after scratching my head for few hours.

Tuesday, August 30, 2011

LDAP Authentication (Active Directory) setup in SOA 11g

This is a short post explaining how to do AD (Active directory) setup in SOA 11g weblogic admin console. AD helps to authenticate users trying to access BPM Worklist or BPM Workspace.

In Weblogic Admin console go to Home >Security Realms >myrealm >Providers


Once done Click on New and provide Name (say ADProvider) and Type as ActiveDirectoryAuthenticator


You can Reorder the Authentication Providers and make sure ADProvider is the topmost one.


Provide the AD specific configuration details on below screen. You may get these details/credentials from your LDAP administrator.


Once all changes are done, save and Activate changes. Then restart the servers and test the LDAP authentication by logging into BPM Workspace or Worklist and ensure that only authenticated users are allowed to login.

Thursday, August 18, 2011

HTTP Binding Adapter in SOA 11g - Continued

This is a continuation of my earlier post on HTTP Binding Adapter support in SOA 11g.
HTTP Binding Adapter in SOA 11g
In this post have captured some screenshots and other tips for getting this to work on SOA 11.1.1.4. First the basic configuration screenshots. Drag the HTTP Binding adapter icon from component palette to the External References section of composite.


 Specify the EndPoint URL which you want to call.
Provide details about the Request and Response schemas (xsd files) here. Based on this the XML gets posted

Finally finish the adapter configuration and move on to configuring the Invoke activity to call this adapter.

Incase you want to make the endpointURI dynamic you can leverage the endpointURI property. You also need to specify the username and password properties. Now the javax.xml.ws.security.auth.username property is available on the UI (properties tab), but the javax.xml.ws.security.auth.password isn't. So you can add this to the code directly. Once added the code will look something as below in your .bpel file

<invoke>
..
..
<bpelx:inputProperty name="endpointURI" expression="....."/>
<bpelx:inputProperty name="javax.xml.ws.security.auth.username" expression="....."/>
<bpelx:inputProperty name="javax.xml.ws.security.auth.password" expression="...."/>
</invoke>

You can either set the username password as BPEL preferences or fetch from DB or some other sources and set the expression above accordingly. That's it ! The code is ready to be deployed and tested. You should now be able to successfully invoke the http binding service.

Tuesday, August 16, 2011

SOA 11g: Managed server startup fails with "Persistency service internal error"

While starting SOA managed server ran into below error.

[soa_server1] [ERROR] [] [oracle.soa.services.common] [tid: [ACTIVE].ExecuteThread: '0' for queue: 'weblogic.kernel.Default (self-tuning)'] [userId: ] [APP: soa-infra] <.> Persistency service internal error.[[
Persistency service internal error.
Check the underlying exception and correct the error. If the error persists, contact Oracle Support Services.
 ORABPEL-9732
Persistency service internal error.
Check the underlying exception and correct the error. If the error persists, contact Oracle Support Services.
        at oracle.bpel.services.workflow.repos.PersistencyDriver.initNonTransactionDataSource(PersistencyDriver.java:271)
        at oracle.bpel.services.workflow.repos.PersistencyDriver.getNonTransactionConnection(PersistencyDriver.java:297)
...
Caused by: org.springframework.beans.factory.BeanCreationException: Error creating bean with name 'FabricConfigManager' defined in ServletContext resource [/WEB-INF/fabric-config.xml]: Cannot resolve reference to bean 'MediatorServiceEngine' while setting bean property 'configurables' with key [2]; nested exception is org.springframework.beans.factory.BeanCreationException: Error creating bean with name 'MediatorServiceEngine' defined in ServletContext resource [/WEB-INF/fabric-config-mediator.xml]: Cannot resolve reference to bean 'FaultRecoveryManager' while setting bean property 'faultRecoveryManager'; nested exception is org.springframework.beans.factory.BeanCreationException: Error creating bean with name 'FaultRecoveryManager' defined in ServletContext resource [/WEB-INF/fabric-config.xml]: Cannot resolve reference to bean 'BPELServiceEngine' while setting bean property 'serviceEngines' with key [1]; nested exception is org.springframework.beans.factory.BeanCreationException: Error creating bean with name 'BPELServiceEngine' defined in ServletContext resource [/WEB-INF/fabric-config-bpel.xml]: Invocation of init method failed; nested exception is java.lang.RuntimeException:
ORABPEL START-UP ERROR!!!!!!!!
OraBPEL run-time system failed to start due to exception:


Restart the SOA Infra database to get rid of this error. Once done restart the admin and managed servers and  the managed server should come up fine now.

Thursday, August 4, 2011

Using the JRockit Mission Control with SOA 11g

In one of my earlier posts I had covered about "VisualGC" which was a performance monitoring tool with SunJDK.
VisualGC: Performance Monitoring tool for Oracle SOA Suite

In this post I would like to cover a similar powerful tool called "JRockit Mission Control" which gets shipped along with JRockit JVM and can be used for performance monitoring and JVM profiling.

For enabling this tool, you first have to modify the setDomainEnv.sh file and add the java properties as mentioned below.

EXTRA_JAVA_PROPERTIES="${EXTRA_JAVA_PROPERTIES} -Xmanagement:ssl=false,authenticate=false,autodiscovery=true"
export EXTRA_JAVA_PROPERTIES

This enables the client machine to connect to the WLS server and pull the JVM stats. I have not specified the port argument above. By default it is 7091, incase a different port is to be used the same can be appended to the comma separated argument list above.

Now you can go to the Jrockit installation folder on your windows/linux machine and navigate to the bin folder where you can find the jrmc file. Run the same and after starting JRMC the following screen appears


 Create a new connection to your Weblogic Server
Next you can start monitoring the JVM/CPU usage and drill down into other JVM options in real time.

I will be covering deep dive details about JRMC in a later post. For now lets enjoy the cockpit styled UI :)